After you read this post, I expect a thank you letter in the mail from every woman in the world. Today I finally embarked on a journey with hair chalking. It was more like the Odyssey to be honest. Homer could have written a story about it. Let me take you through my journey, shall we?
Every girl has wanted to try hair chalking since Lauren Conrad did it with her beauty team a few months ago. It was a trend that was coloring the nation… ha ha, get it? Anyway. Listen, if you don’t have platinum blonde hair, just stop reading right now, close the screen, and forget you ever wanted to try hair chalking. It is a waste of time & money. I mean that in the nicest way possible… I just really wish someone explained that to me first!
If you insist on trying it out, this is what you would need…

Soft Pastels, which you can find at any arts & crafts store like Michaels or AC Moore. I got really excited about trying this hair chalking and I thought I would love it and do it all the time so I splurged on the big box… womp womp. It was only $13, but still. So this is all you really need…. soft pastels.
Step one: Decide how much of your hair you’re actually going to chalk and section it off. I was ambitious with my first attempt… I did the bottom three or four layers of my hair. I started with the bottom layer and sectioned it off as if I was going to curl or flat iron it.
Step Two: Section that section off into smaller pieces and wet the hair. This is especially crucial if you have darker hair color. The chalk will not show up on darker hair that is not wet.
Step Three: Twist the section and begin chalking. This is what it will look like…

NOTE* For darker hair, brighter and darker colored chalk shows up the best. Do not try to use light pastel colors.
Step four: Continue step three to all the sections you wish to chalk. Just remember… this is messy, messy stuff. It’s going to get all over your hands, your face, your back… whatever. It comes right off with a little soap and water so don’t be alarmed, just warned!

Step five: This is really important, and if I had been made well aware of what happens after step four, I don’t think I would ever have chalked my hair to begin with. Your hair becomes one giant knot in an instant. The chalk soaks up any and all moisture that your hair ever had and it begins to resemble a desert tumble weed. There is nothing you can do to avoid this and it makes the rest of the process a real bitch. The “experts” tell you to use a natural boars hair bristle brush to brush off the excess chalk when you’re all finished. And do you know why they tell you to use one of those brushes? They’re typically used for extensions, the bristles do not get caught on the bonds as you brush our your hair. SO ladies and gentlemen (if you’re a guy and trying this out, who knows) they tell you to use that kind of brush because you don’t have a chance in hell of getting a real brush through your hair once it’s been chalked.
Step six: DAMAGE CONTROL. After your hair has been brushed out, and you’ve popped a few Vicodin to take care of the pain, they say to flat iron your hair to seal the chalk in. I flat ironed my hair because I looked like I stuck my finger in a light socket.

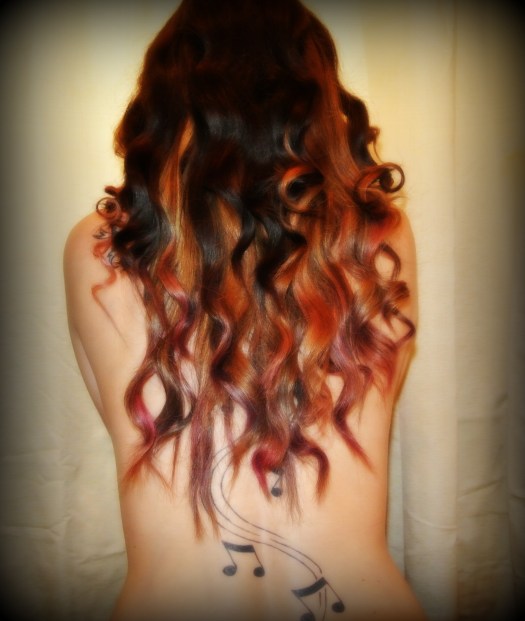
Simply flat ironing was not enough, though. My hair was still knotty and still dry so I decided to take styling a step further and use a curling wand. After this long, hard process, this is what I came out with.

Please take note that there is virtually no blue chalk to be found anywhere in my hair…

So that is that. I’m glad I did it… to be honest. Now I have it all out of my system and my dreams of portraying Christina Auguleria in her “Dirrrrrty” days are finally over. So if you still feel the need to try some hair chalking, then so be it, but don’t say I didn’t warn you!
Once this ish washes out you will need about 10 deep conditioning treatments in a row to restore all the natural moisture the chalk stripped form your hair so make sure you have one of those handy as well! I use L’Oreal deep conditioning treatments and you can find them at pretty much any drug store.
If you’re a first time chalkier I suggest trying it out in small sections. I went to get a blow out the other day and my stylist had just the tips of her hair in the front dipped pink, it looked adorable and not over done. Try that out and see how it goes! Let me know if you have any horror stories like mine. ;] Good luck! xo
